How to Replace a Car Key Shell Without Damaging the Internals
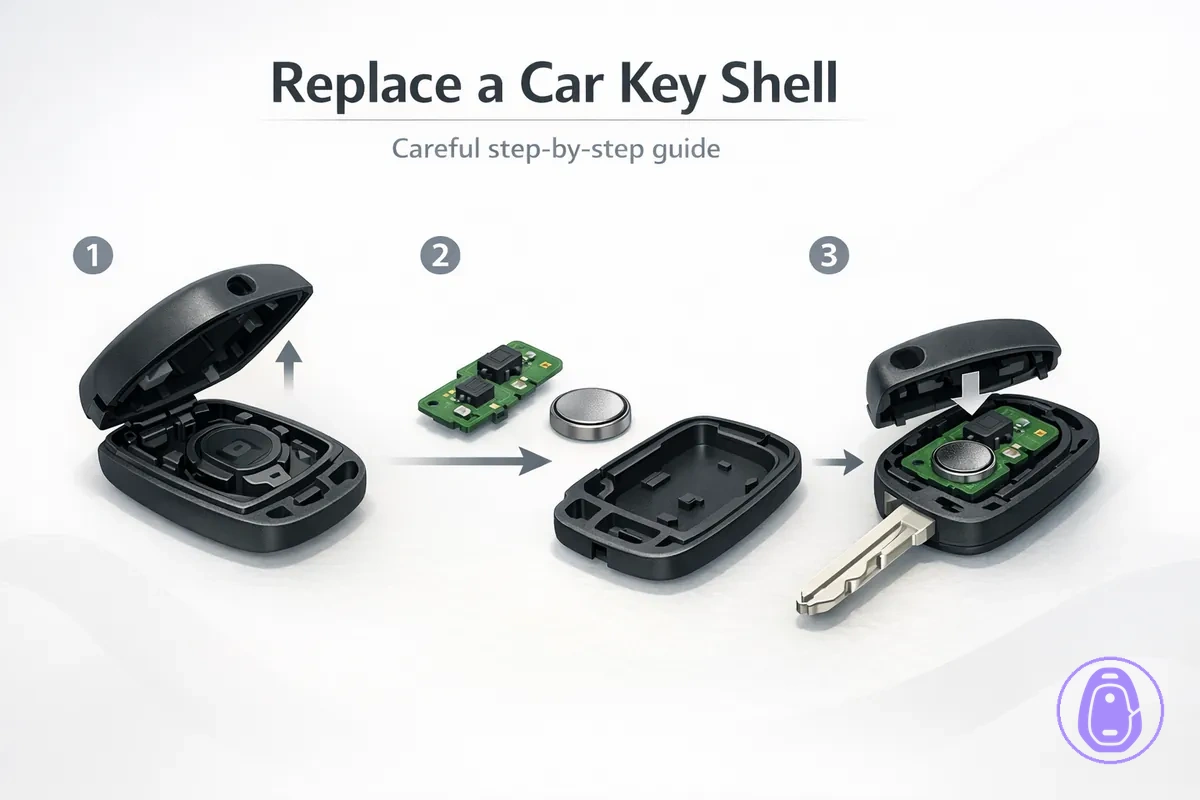
To replace a Car key shell housing, transfer the internals from a worn or damaged key fob shell to a new one. Aim to keep components seated and undamaged. The process targets housing, shell, seam, and fit while typically preserving the circuit board, button membrane, and battery. Shell damage or fit issues differ from electronics faults, which need separate checks.
A safe workflow starts with a fit check on the new Car key shell, then careful opening of the old housing by its fastening type.
Use a pry tool only after confirming screws or clips to avoid cracking the shell during separation. See the Back to replacement hub for related guidance, and identify fastening type before force.
Rushed transfers can misalign internals like the circuit board or battery; use the right tools and a clear workspace. Post-assembly checks confirm button response and seam closure.
- Prepare tools and workspace
- Confirm fit check on new housing
- Identify fastening type: screws or clips
- Open old key fob shell
- Transfer internals intact
- Reassemble new Car key shell
- Verify physical integrity and function
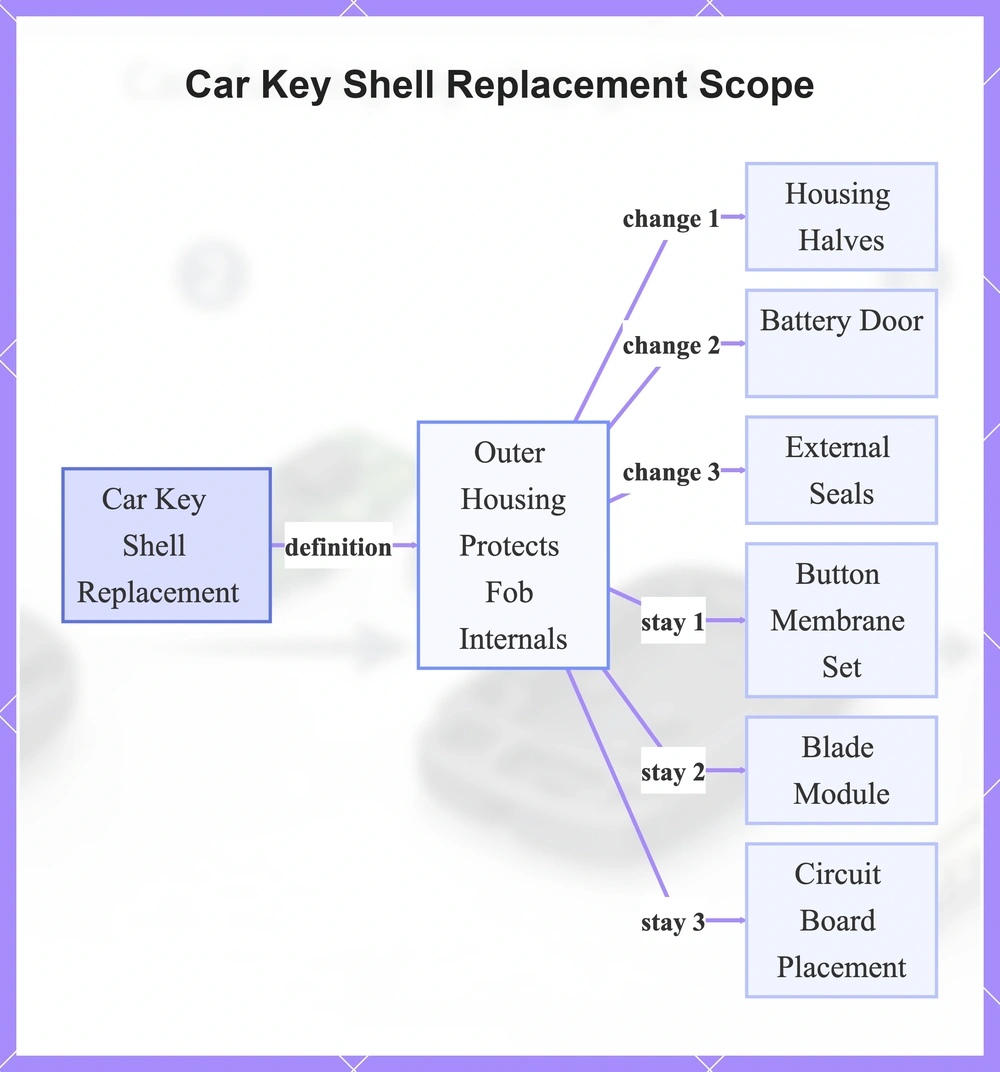
Car key shell replacement scope: what you replace and what stays the same
Car key shell replacement focuses on the outer housing that protects key fob internals. Internals like the circuit board and blade module transfer to the new shell. The swap typically restores physical integrity while keeping core electronics intact.
Cracked housing or loose buttons indicate shell wear, while a dead fob or no response suggest electronics problems. Replacement typically preserves transponder function and requires no reprogramming.
Changes
- Housing halves
- Battery door
- External seals
Stays the same
- Button/membrane set
- Blade module
- Circuit board placement
This flowchart shows what car key shell replacement focuses on, the parts it replaces, and the components that stay the same.
Confirming the replacement shell matches your key before opening anything
Check that the replacement Car key shell fits the original before you disassemble anything. That avoids wasted time on a bad match.
A mismatch in outline, buttons, or internals can cause button response problems or loose closure after transfer. Confirm compatibility first with these match points, since photos often miss internal geometry differences.
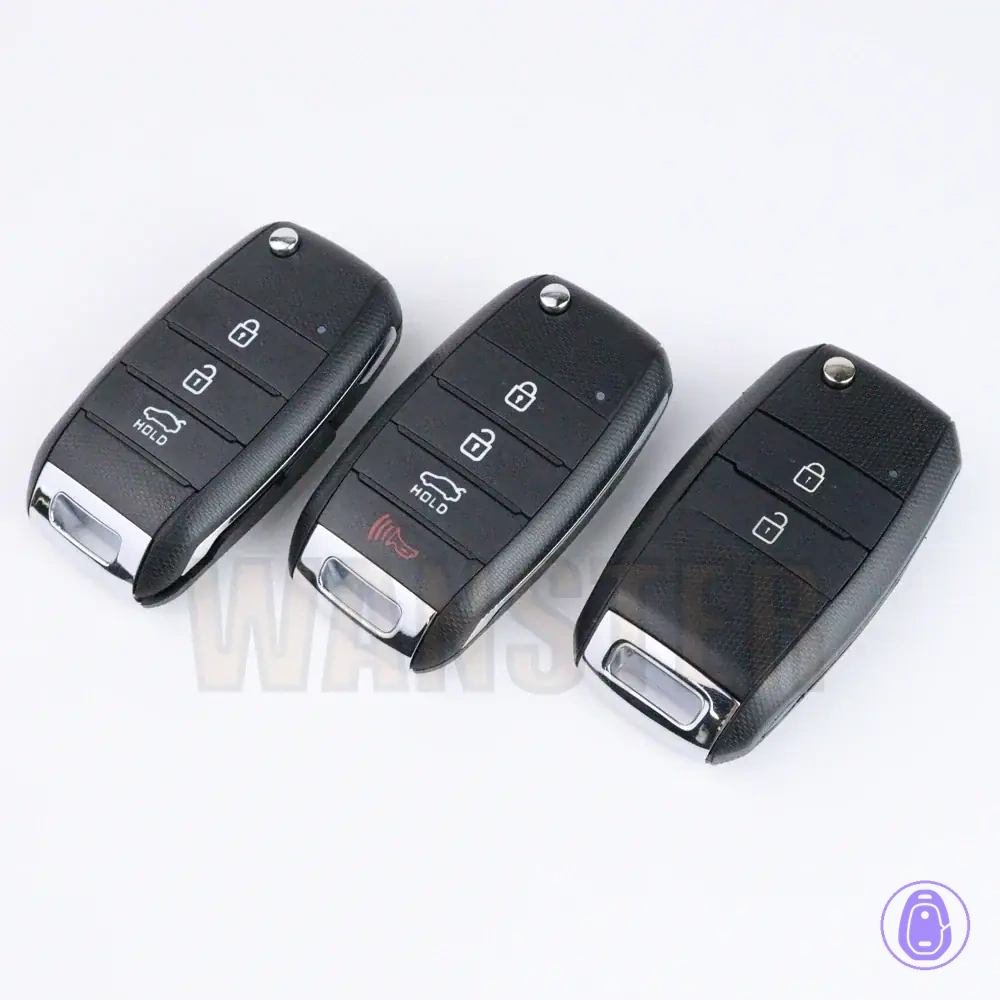
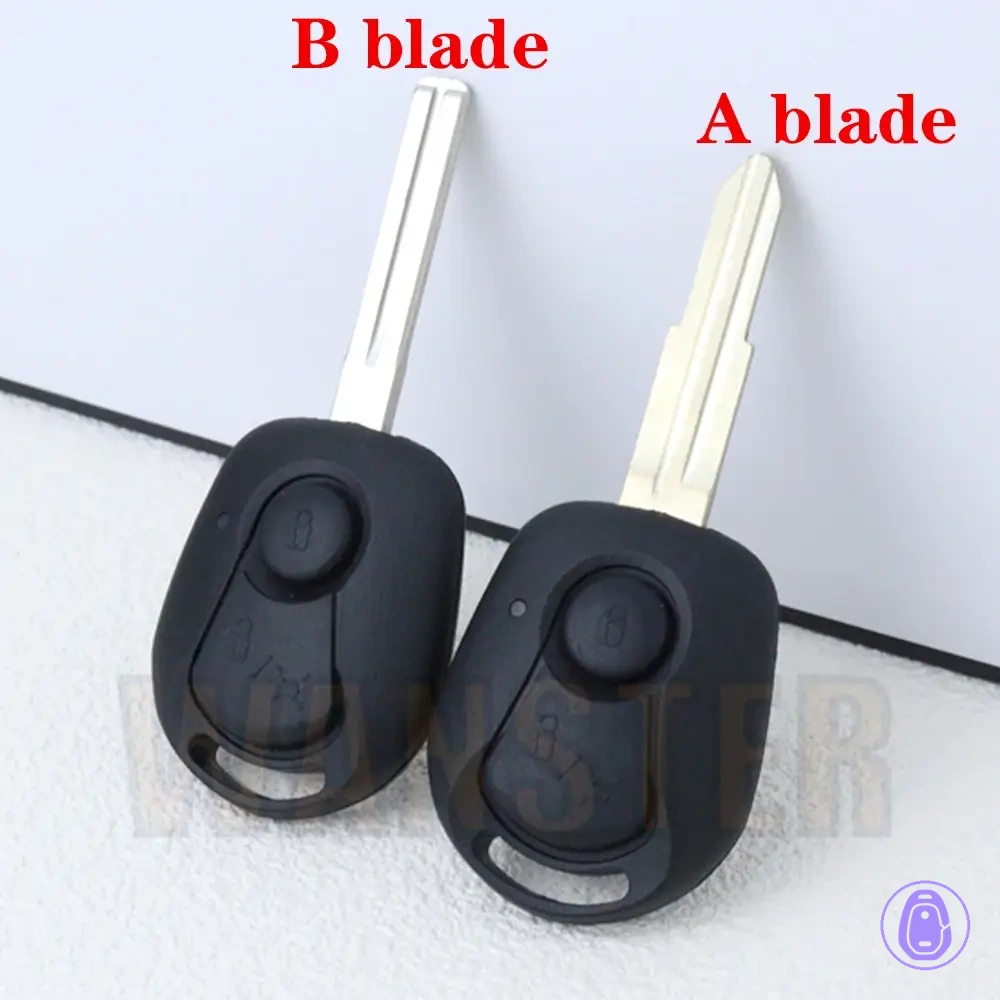
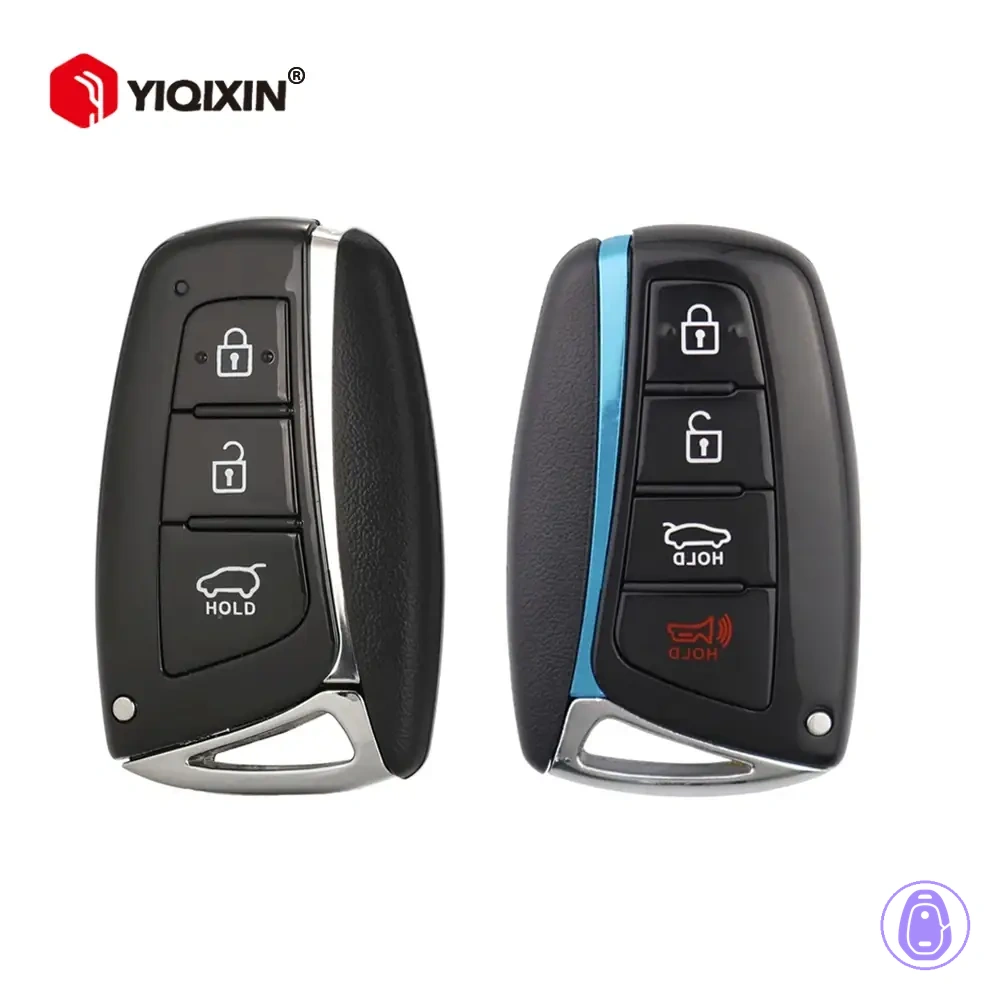
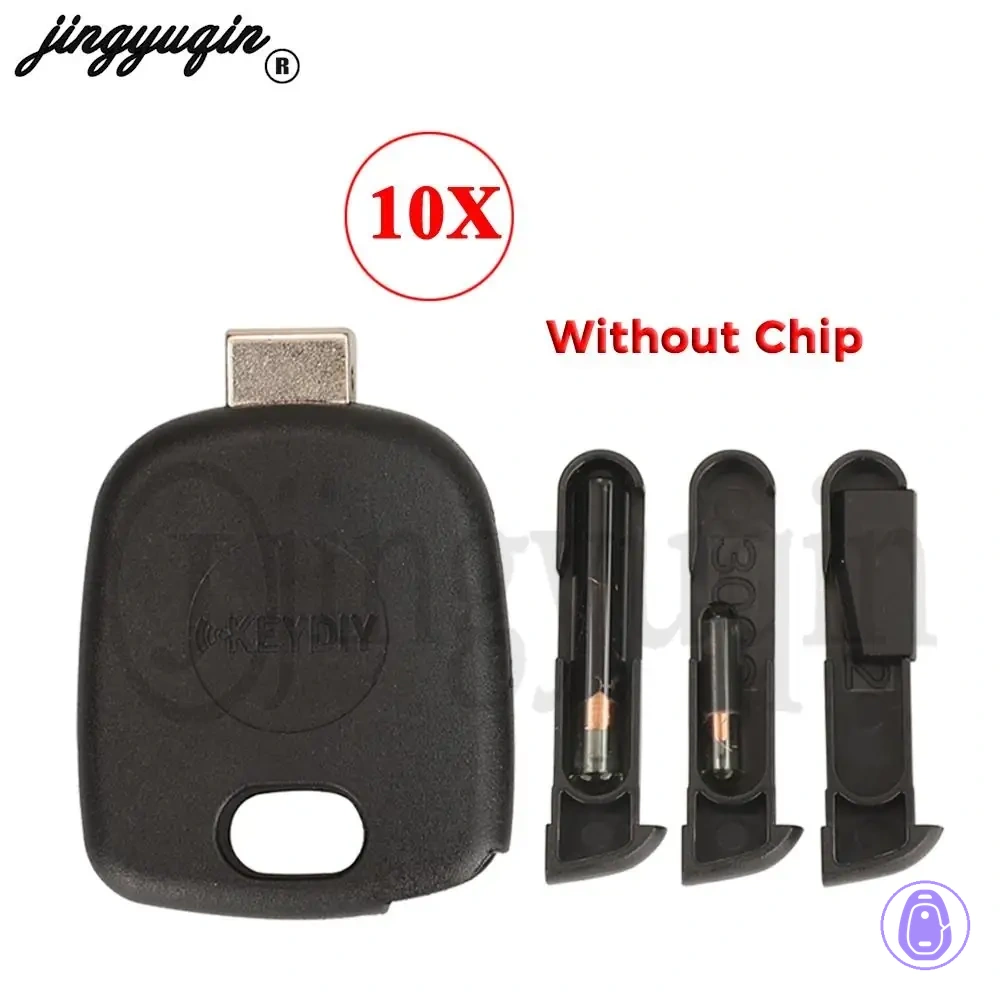
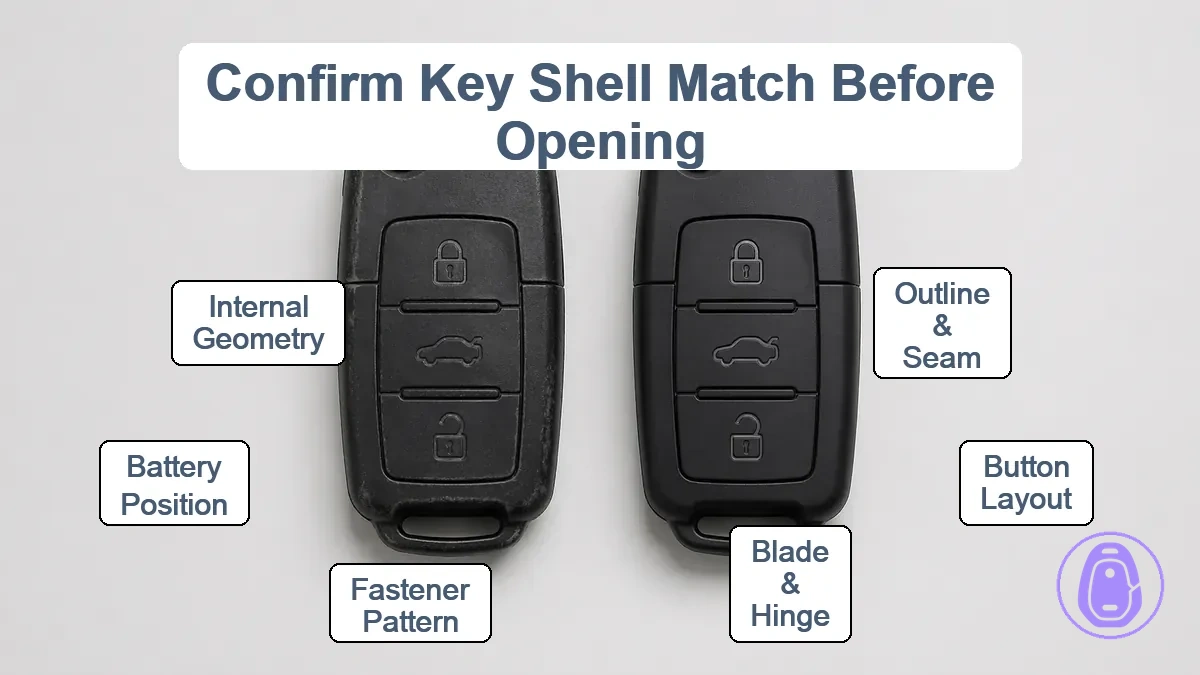
Use this checklist to verify fit:
- Outline and seam placement: Hold shells side-by-side; the overall shape and seam line should align.
- Button count and layout: Match the number of buttons and their spacing or arrangement.
- Blade type and hinge area: Confirm the blade slot shape, size, and hinge or pivot position line up.
- Screw or clip pattern: Check for visible fastener locations, such as hidden screw holes or clip tab positions along the seam.
- Battery position: Verify the battery compartment size and placement match.
- Internal tray geometry: If visible or from seller photos, check that circuit board slots and alignment posts correspond.
Outline matches can still fail due to button pad alignment or hinge geometry, so check every point before starting.
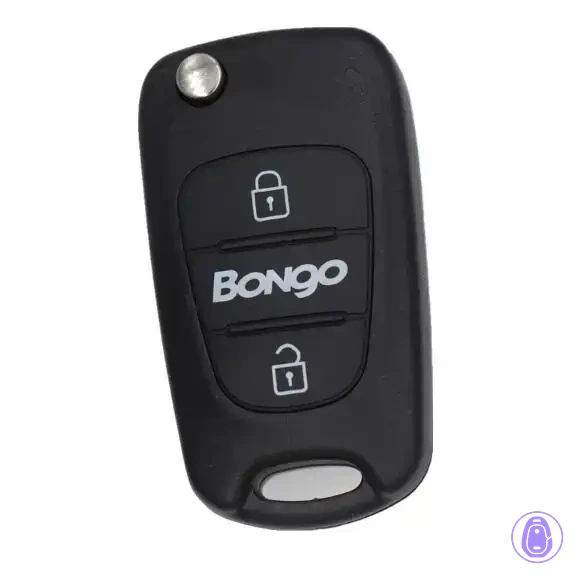
Illustrative Car key shell listings show matching button layouts, blade slots, seams, and hinges.
Preparing tools and a safe workspace for a damage-free shell swap
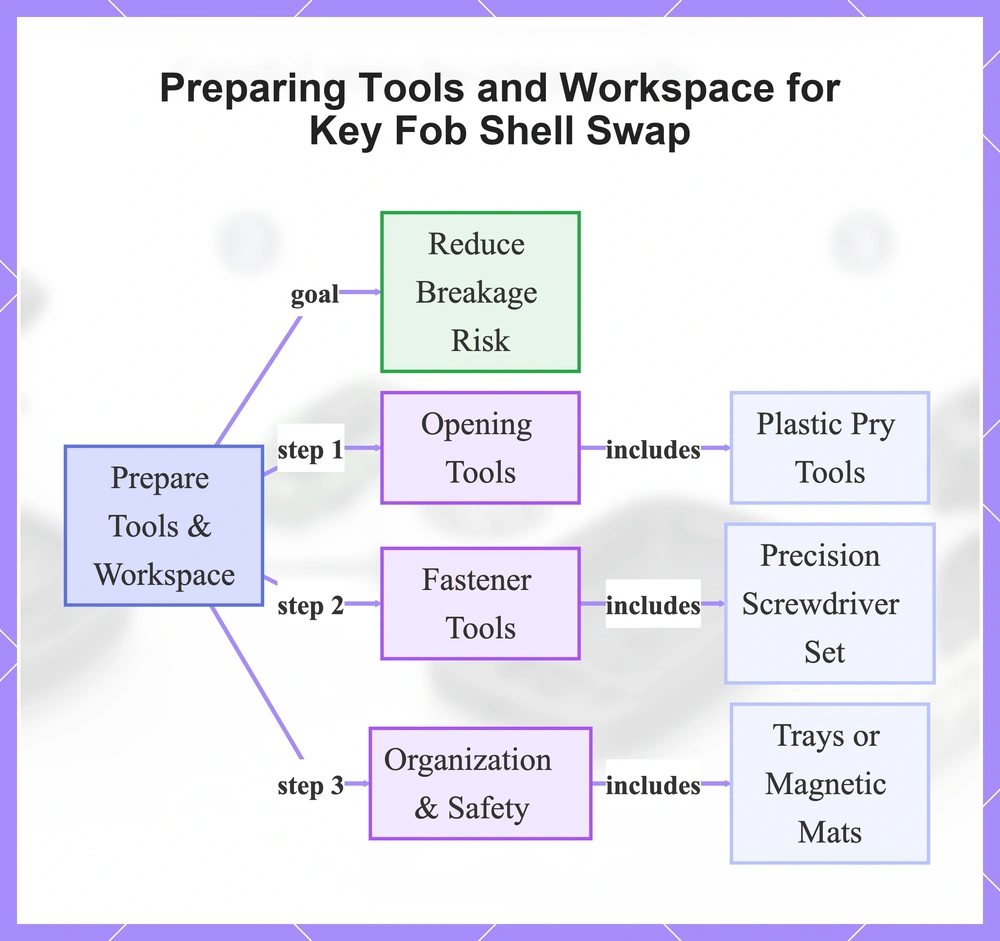
Reduce breakage risk by gathering the correct tools and setting up an organized work surface before opening the key fob shell. A stable setup helps prevent lost parts and damage to plastic housing or internals during disassembly.
Opening tools
- Plastic pry tools to release clips without scarring seams; metal tools can scuff the seam and weaken future closures.
- Slim pry sticks for gradual tab release along the housing edge.
Fastener tools
- Precision screwdriver set matched to tiny screw heads, such as Phillips or flathead equivalents.
- Tweezers for handling small screws and springs without dropping them.
Organization & safety
- Trays or magnetic mats to capture and sort removed parts by stage.
- Bright task lighting to spot hidden fasteners and alignment points.
- Anti-static precautions, like a grounded mat, to protect circuit board contacts from discharge.
This flowchart shows the key preparation steps and essential items to reduce breakage risk during key fob shell disassembly.
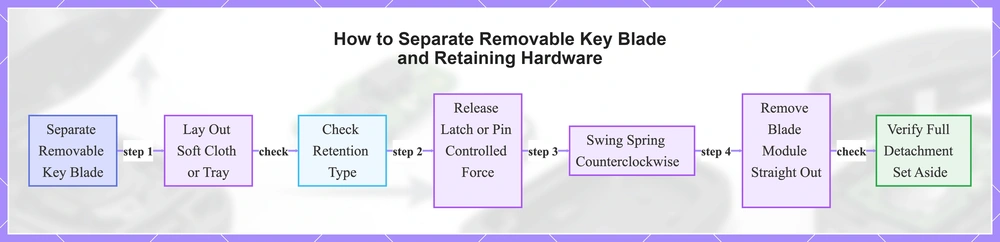
Separating a removable key blade and retaining hardware when present
Not every car key shell has a detachable blade module with retention parts. Lay out a soft cloth or small tray first to catch small parts like springs or pins.
- Place the car key shell flat and check the blade area for its retention type—latch-only or pin/screw—since designs vary.
- Press or slide the latch to release it, or use a precision tool to remove any retaining pin; apply controlled force to prevent bending.
- Look for a spring beneath the retention metal piece, then swing it counterclockwise to reveal the blade module.
- Remove the blade module straight out, keeping track of its orientation in the shell.
- Verify the blade module detaches fully without leftover hardware, then set it aside in the same position for reassembly.
This flowchart outlines the preparation, checks, and steps to detach the blade module from a car key shell while preventing damage.
Identifying how your key fob shell opens: screws, clips, or mixed fastening
Examine your key fob shell closely to identify its fastening type before applying any tool or force, as screws require driver removal while clips need gradual prying along the seam.
- Small Phillips-head screws visible along the back or sides → screwed fastening.
- Screw heads recessed under a battery cover or rubber plug → hidden screw fastening.
- Smooth, continuous seam running around the entire perimeter without holes → clip-only fastening.
- Small tab-like protrusions or notches visible inside the seam → clip tab indicators.
- Combination of visible screws plus a defined seam line → mixed screw-and-clip fastening.
- Uneven seam resistance points or partial screw covers → potential mixed or hidden screw warning.
For screws or hidden screws, proceed to "Opening a screwed key fob shell without stripping or cracking the housing". For clips, use "Opening a clipped key fob shell without snapping tabs or scarring the seam".
This flowchart shows visual checks to identify if the key fob shell uses screws, clips, or requires a mixed fastening warning before choosing the opening method.

Opening a screwed key fob shell without stripping or cracking the housing
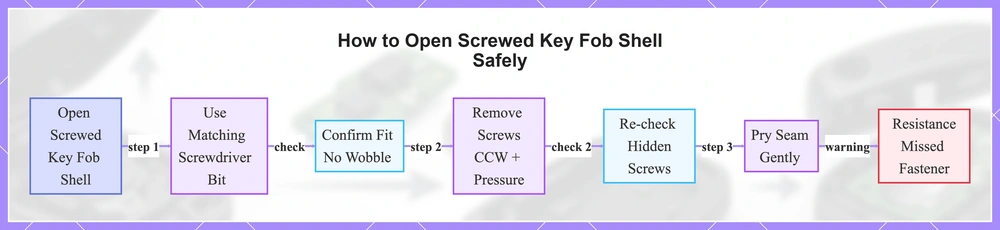
Use a screwdriver bit that matches the screw heads exactly. Apply steady downward pressure as you remove them to avoid damaging threads or housing.
- Confirm driver fit: Choose a precision Phillips bit that sits fully without wobble to avoid stripping heads.
- Remove and organize screws: Turn screws out counterclockwise one by one with even downward pressure. Place each in a tray or magnetic holder right away.
- Re-check for hidden screws: Look along battery cover edges, under labels, and in seam areas before prying.
- Separate the seam gently: Start a plastic pry tool at one end and move around with light force. If the seam resists, a fastener is missed.
Precision screwdriver sets offer bits matched to small key fob screws.
This flowchart shows the key steps and checks to open a screwed key fob shell without stripping screws or cracking the housing.
Opening a clipped key fob shell without snapping tabs or scarring the seam
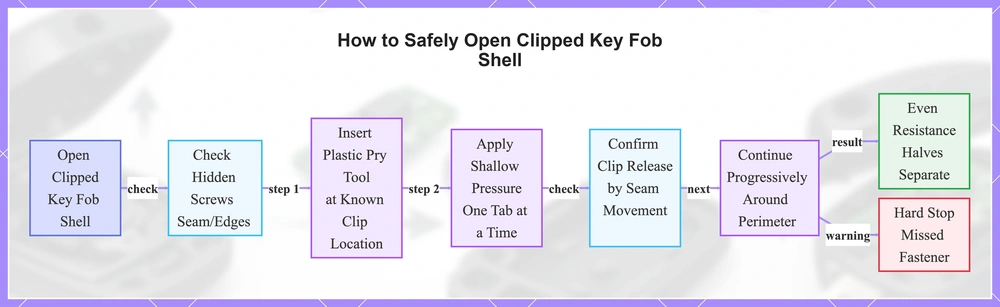
Check for hidden screws along the seam or edges before prying, as missed fasteners can mimic clip resistance and lead to housing damage.
- Insert a plastic pry tool into the seam at a known clip location, such as around the battery compartment or button cluster where clips often concentrate.
- Apply shallow pressure to release one tab at a time, working progressively from one end of the seam to the other.
- Confirm each clip release by a small movement or relief along the seam edge before advancing to the next tab.
- Continue around the perimeter without forcing random points, maintaining even separation to avoid over-bending the housing halves.
- Halves separate successfully with even resistance along the seam; a hard stop at one point suggests a missed fastener or stubborn clip cluster.
This flowchart shows the step-by-step process with checks to open a clipped key fob shell without snapping tabs or scarring the seam.
Removing the internals from the old shell without losing alignment or small parts
Remove internal components from the old Car key shell in a controlled sequence to keep their positions for transfer into the new housing. Start with the battery to avoid contact problems, then the button membrane stack, circuit board, and seals or springs. Lay out removed parts on a soft tray in their removal order and orientation—trace an outline of the old shell on paper to match positions later.
- Lift out the battery by sliding it free from retention clips or contacts. Note the positive and negative orientation marked on the board.
- Detach the button pad or membrane stack above the circuit board contacts. Gently peel it upward while checking alignment posts that guide its seating. Preserve button pad placement relative to the board switches to help maintain consistent presses after reassembly. See the Transfer internal components safely guide for more on safe transfer.
- Free the circuit board by unclipping it from housing posts or standoffs. Grip only the edges to protect traces and solder points. Battery contacts often flex slightly, so support the board fully during removal to prevent bending. Take a reference photo if helpful for reorientation.
- Extract remaining small parts last, such as rubber seals around edges or tiny springs in button areas. Note their compression direction and attachment points to match in the new shell—they fit into specific recesses or over posts.
Handling the circuit board and contact points to avoid static, bending, or contamination
Key fob shells contain circuit boards that differ by design. Careful handling cuts risks of static damage, oil contamination on contacts, or bending problems.
- Do grip the circuit board by its edges (safe areas distant from contact surfaces) to help prevent oils from transferring and causing intermittent connections.
- Avoid touching contact surfaces or pins directly with fingers, as skin oils can corrode them over time and lead to unreliable signals.
- Do ground yourself before handling by touching a metal surface or using an anti-static strap if available, to discharge static that can damage sensitive paths.
- Avoid flexing or bending the board during removal or placement, as this can crack traces and result in dead zones.
- Do inspect and clear any debris from the new shell interior beforehand, preventing shorts or poor seating on contacts.
- For unusual or uncertain board layouts, stick to minimal handling and use tweezers for positioning.
Keeping buttons, membranes, springs, and seals in the correct orientation
Keep non-electronic parts like buttons, membranes, springs, and seals in their original orientation during transfer to the new Car key shell. That protects button response and ensures shell fit.
- Membrane direction: printed side or conductive surface faces buttons for even contact.
- Button cap position: caps sit flush over membrane domes without tilt.
- Spring seating: springs rest evenly in holders without twisting.
- Seal placement: seals lie flat along edges without folds.
Misalignment can cause sticky buttons or poor tactile feedback. Watch for pinching during seam closure—it may flatten membranes or bind springs.
Installing the internals into the new shell for proper fit and consistent button feel
Fit the internals into the new Car key shell using the reverse order from removal. This restores alignment and button feel without forcing parts.
Work from the smallest parts outward, confirming each layer sits evenly on alignment posts with no gaps or overhang. Stop right away if a part resists, as that points to misalignment which may pinch components on closure.
- Position springs and seals into recesses on the shell base. Check they seat fully without shifting when lightly pressed.
- Place the circuit board onto alignment posts, lining up contact points with battery terminals and membrane areas. Gently rock the board to verify stability; check for lift or tilt.
- Layer the button membrane over the board, matching raised contact domes to button positions. Press each dome to test seating; check for even contact and consistent travel.
- Insert the battery into its retention slot, confirming contact with terminals. Tilt the shell to check retention; the battery stays secure without sliding.
Precision tweezers make positioning small parts easier. Once all internals are seated, test button travel in the open shell for smooth, even depression before reassembly.
Reassembling the shell: closing seams, reinstalling screws, and avoiding pinch points
Line up the Car key shell's housing halves precisely. Apply even pressure along the seams to engage the clips gradually. That seats internals steadily and cuts pinch risk to button pads or membranes.
Check seam edges first for debris or misalignment that blocks flush closure.
- Match all posts, trays, and edges visually to align halves; keep internals steady to cut movement.
- Press evenly around the perimeter using thumbs or a soft tool. Start at one end and work slowly to engage clips without twisting.
- Look for small relief movements or even resistance to confirm clip engagement. A flush seam without gaps usually means success.
- Snug screws gently in a cross pattern with the right driver size to avoid stripping. Gaps mean reopen and check alignment plus internals.
Blade modules removed earlier need secure seating in the slot with no play before closure. Over-tightening can crack the housing; loose screws let it rattle.
Post-assembly checks: buttons, battery contact, range, and physical integrity
Validate the Car key shell replacement by checking function and fit in sequence before daily use. Test each button across the full travel range for consistent response without sticking or gaps in activation. Check battery seating next, followed by seam alignment, absence of rattles, and basic range behavior.
- Check button feel and response → If intermittent, sticky, or unresponsive, it suggests membrane misalignment or pad contact issues.
- Check battery contact → If loose or poor connection shows as no response, it suggests shifted contacts or insecure seating.
- Check seam flushness and gaps → If uneven or visible separation exists, it suggests incomplete clip engagement or misalignment.
- Check for rattle or wobble → If movement or noise occurs when shaken gently, it suggests internal looseness or missing retention.
- Observe range behavior → If reduced or inconsistent across key designs, it suggests battery or contact problems rather than shell fit.
These checks help confirm mechanical integrity after reassembly. For symptoms like dead response or gaps that persist despite correct assembly, Troubleshooting hub covers internal faults beyond shell replacement.
Replacement mistakes that cause poor fit, non-working buttons, or broken clips
Spot these key replacement mistakes to avoid repeat problems with Car key shells. Wrong matches and assembly slips typically cause mechanical issues that need disassembly to fix.
A mismatched shell, for example, often leads to unresponsive buttons or loose fit. Check the Replacement mistakes to avoid page for more details.
- Wrong shell match → button misalignment or loose internals
- Missed hidden screws → uneven seam gaps or housing cracks
- Prying wrong seam → snapped clips or scarred housing
- Misaligned membrane → non-working buttons
- Pinched seals → poor closure or rattles
- Missing springs → inconsistent button travel
- Over-tightened screws → stripped threads or deformed housing
Assembly errors show as gaps, rattles, or stiff buttons. Electronics problems block circuit response even with good mechanical setup.